Thursday, March 31, 2011

Kitchen Reno Report #3: Painting is Hard Work

I recently visited a former art teacher in her home and had one of those 'ahha' moments gazing at her walls. She's a brilliant visual artist and the walls in her home have become a canvas. On one she's drawn a fine black line that's eerily akin to the silhouette of a mountain range at dusk. Another looks like rough hewn cob, its drywall textured with a range of desert- inspired colours. Small details- like a group of unstable rocks set to 'drop' from above- add whimsy and delight.
I used a roller, and one swipe over the stencil did the job.
Her walls smashed my expectations that "two coats of the same colour paint shall be applied in equal thickness to all the drywall in one's home." (Can you tell I don't have cable TV? No doubt I'd find lots of out-of-the-box painting on the home channel- to striking and terrible effect!) All this to say that when it came to painting our kitchen again, I wanted to include some surprises too.

House painting is something I often discount as an 'easy' project. Unlike wiring 220 V, anyone can do it, right? Maybe, but its a helluva lot of work,  starting with the right paint colours. 

Because I hadn't kept record of the paint we used last time, I picked out similar-looking paint samples. Turned out, each tint I chose was just a little off from the original reno project. The cream cabinets were more brown than yellow, which looked nasty against the yellow walls and dirty against the red inset cabinets. I sprayed the the backsplash 14 times to get the colour right.  And though we originally planned to only paint the cabinets and backsplash- we turned out painting everything, sometimes twice and (in one case) three times. 

This wall is by our back door. I painted it with magnet paint (very cool), and then painted a 'white board' paint over top. Apparently white board markers are supposed to wipe off. Our first renderings of cats and weird alien creatures never did clean off- and so I painted over it all with white latex. $30 of white board paint = big waste of money and time.

Four year old Madi paints with her trusting, brave Daddy. It went better than I thought.

The kitchen was an early addition (the house was built in 1917, the kitchen probably was added in the 20s or 30s), we think the clapboard wall was once a covered porch... When we moved in, this wall was covered by cabinets. We ripped them out and found this bowed buffet and hutch at the Strathcona Antique Mall to replace the cabinet storage.


Stencils are tricky things- they are super personal. When we moved in, the front entrance way had stencilled grape vines scalloping the edges. It was the first thing we painted over. And now, I have become a little stencil crazy- liberally stencilling Ed Roth's bird designs all over my home.


So, from your perspective, is this sequence a picture of a bird rising or falling? 


I used both colours of spray paint from the backsplash, to colour these hummingbirds. The copper was the main colour then I lightly spot sprayed the silver on the feathers' edges.
This swallow is actually part of a larger series of them, coming up the basement stairs (from which I'm taking this picture). Someday I'll post pictures of the bird filled stairwell- but this guy escaped the stairs into our kitchen... and is about to dive bomb this Alphonse Mucha calendar print.


See the other posts on this kitchen's progress here

Monday, March 28, 2011

Cold Rise Dough

Another great bread workshop yesterday- thanks to the five women who mixed their way to a high carb future (and had great humour when, during the low point of the afternoon, the mixer and its operator showered one participant with a pasty water/flour shower!).

I realized that I haven't ever posted pictures of my dough after it's cold risen in the fridge. Here are a couple shots:


This whole wheat, hemp bread had risen for a couple days, but its not unusual for the bag to look this plump overnight. I usually reuse these bags over again (until they pop with one particularly excited, active dough), but I've also used a large tupperware container.

The books that inspired me to try cold rising are ones I've mentioned before: 'Artisan Bread in Five Minutes a Day' by Zoe Francois and Jeff Hertzberg and 'Artisan Breads Every Day' by baker Peter Reinhart. For many commercial bakers and pizzerias, cold rising bread is nothing new- but for home bakers, these books brought the cold rise method to the masses.

There have been a couple significant benefits to our family in the practise of cold rising dough:

1. I make 2-3 batches of dough ahead of time and then bake it, as loaves, buns, pitas, pizza dough, cinnamon buns, etc, when I'm ready. The dough can be left in the fridge for up to two weeks.  For single people, there's the added benefit that you can bake in small batches. 

2. Slowing down the fermentation process really enhances the bread's flavour-- sourdough is based on this principle. I do notice that after a few days in the fridge, the crumb from cold-rise dough is lighter (more holes) and more flavourful.

If you have other benefits to add to my list, drop them in a comment below.

Thursday, March 24, 2011

Seed Starting 2011- In pictures

Nothing like a four year old in charge of dirt... The aprons were a gift at Christmas, bought by my sister in law from an Etsy shop.

Unfortunately, parts of my fancy 'self-watering' Lee Valley seed starters were food for the winter mice in the garage. I salvaged the tops and placed the capillary mat (that draws water up) in a glass 9x13 pan from the kitchen. This seems to be working. 

Madi is learning to write- and made most of the labels that were taped to the sides of the flats, directly under the designated cells.

Remember when I said I was 'going simple'? I couldn't help myself and ordered, then planted 8 cells, of Goji berries.

I'd love to hear how you organize. I place all my seeds in different bags: "Indoors 12 weeks" (plant before first frost free date. Here in Edmonton that's anywhere between May 7and 31!) "Indoors 8 weeks", "Indoors 4 weeks" and "Outdoors early"and "Outdoors late"

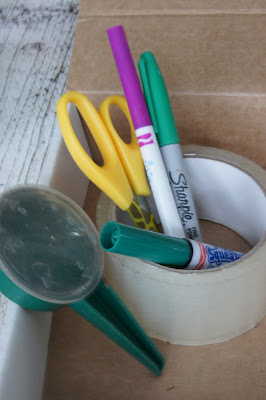
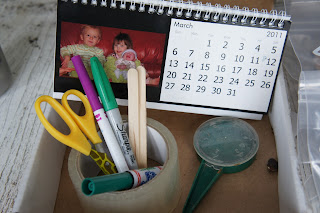
I keep this stuff close: scissors, pens and tape for labels. The green  bulbous spike is for seeding- $4 allows me to drop one seed in each hole at a time (instead of scattering heaps of seeds to later be 'thinned').

My garden book has coils so I can tape extra seed packs in, I also staple in most of my seed and plant orders so I can remember varieties and quantities from year to year.
The calendar allows me to count forward and back from May 7th. I'm an optimist when it comes to frost. I like Lois Hole's advice in her Vegetables book-- 8 out of 10 times you win when you plant a little early- harvesting at least 2 weeks earlier. The risk is that your first sowing of seedlings like carrots and peas die in a late frost but only, according to her math and experience, 2 out of 10 seasons. 

My scratchings.
 Date on top then a rough chart: Row 1: Name of seed. Row 2: Number of cells planted. Row 3: Date planted. Row 4: Date of germination (the first sign of green)


Tell me how you keep track and stay organized! I'd love to know.

Tuesday, March 22, 2011

Yogurt-- I Finally Made It!

If you were following along with my household dramas in the Fall of 2009, you'll remember my yogurt making experiments- sans a yogurt maker appliance- went bust (see the post here). Three times I followed recipes that failed to produce anything but sour milk and a phlegm like texture.

Its been a year and a half and I finally felt ready to brave the experiment again (Thanks for the inspiration, Evelyn at A Chaotic Lifestyle). 

I'll skip the suspense to announce my final results, in a frenzy of caps lock excitement: THREE TIMES I'VE SUCCESSFULLY, MIRACULOUSLY turned milk to yogurt! 

While the first re-trial came out more like Yop than Yogurt, which I froze as popsicles and no one knew the difference, the second and third were progressively more firm. I've Mother Earth News to thank for the instructions. Find the full article at Mother Earth News. 

For the curious, I simplify the process below. If you decide to try it, reference the full article at MEN.


First, I melted 2 T of honey at bottom of pot to prevent milk scalding at the heat source.
Then on mid-low heat for about 30 minutes, I heated four and a half cups of milk until skin formed on top- with bubble trapped below. Turning off heat, I cooled milk for another 30 minutes until it didn't burn by inner wrist- but it stung (did mention there is some masochism involved in this?)
As the milk heated and cooled, I added a couple tablespoons of raspberry jam to the bottom of 2 of 3 clean, 500 ML jars. I kept one plain so I had starter for next time.


Once the milk was 115 F (hot but not too hot to the touch), I mixed in a couple Tablespoons of 'starter'. The yogurt contained NO gelatin, and ACTIVE bacteria cultures. I also added 3 Tablespoons of skim milk powder.


I then placed the jars in the crock pot and filled it with HOT water. I occasionally and shortly turned the crockpot on low to keep the water warm.  When I headed to bed, I placed the glass covered pot under the cabinet lights. This seemed to keep the water relatively warm. In the morning, I checked how thick the yogurt was (it wasn't quite ready) then kept the yogurt in a warm bath for most of the day. When the yogurt finally seemed thick enough, I refrigerated the jars.

[On another occasion, I put the jars in my dutch oven and placed this into a cooling oven. Along with the oven light on overnight, this provided enough heat to solidify the yogurt.)


The four and a half cups of milk produced the equivalent amount of yogurt: about a tub and a half of the standard 650 g worth about $5- 8 at the store. Homemade it cost me $1.25. After doing it three times, I feel pretty confident that I could do it regularly without much trouble-- most of the time it takes to make involves me sleeping, surfing the net, and working on other things in the kitchen. 

Tonight, I'm happily calculating how many pairs of shoes and Lee Valley garden tools I can buy with my savings. As I do, I'm sucking a raspberry, yogurt popsicle that once was Yop, which before that was milk in my fridge. 

Saturday, March 19, 2011

Seedy Sunday Edmonton is TOMORROW

ALERT: Edmonton Gardeners and Local Food Folks


Here are the deets for the official Edmonton Seedy Sunday being held tomorrow afternoon in the Alberta Avenue neighbourhood. Hope to see you there!


Seedy Sunday
March 20, 2011
11:00 a. m. to 4:00 p. m.
Alberta Avenue Community Hall
9210 118 Ave NW, Edmonton

seed exchange * seed vendors * books * gardening displays * kid's table
* gardening book * magazine exchange * concessions 


Speakers Include:

Growing From the Ground Up: Beginning Gardening 101
Anita Gregoire 
www.toobusyhands.com
Urban Permaculture
Dustin  Bajer 
www.permaculture.jasperplace.ca
Gardening for Pollinators 
Patty Milligan 
www.lolacanola.com
Growing Fruit Panel
Thean Phen Amanda Chedzoy
free admission/donations accepted

When you're done…..check this event out across the street:

Explore the many ways to get your food - beyond the supermarket!

Community Supported Agriculture programs, food boxes and delivery,
co-ops, community gardens, clubs…. meet the people behind them, find out what will work for you, and sign up!    

Where: Nina Haggarty Arts Centre (Opposite Alberta Avenue Community
League), 9225 - 118 Avenue, Edmonton, AB T5G 0B1
When: March 20th, 2-5pm
Entry by donation to Slow Food Edmonton

Thursday, March 17, 2011

Kitchen Report #2: The Backsplash

When we moved into our home we loved the kitchen backsplash. It looked like old-school tin ceiling tiles however on closer inspection, you realized it was raised wall paper with metallic paint. When we ripped out the kitchen, the original backslash inevitably got destroyed. So we wallpapered it all again and planned to repaint.


Of course, two years later it was still white. I didn't mind the white, except that it stained so easily and the matte wallpaper did not wipe clean from basic spills (you know, when the blender barfs smoothie? or when a jar of tomato sauce smashes on the quartz counter tops?)

In our quest to Do It Right (see the past blog posts here) we washed the wall paper as best as we could. We taped everything well, took off the electrical covers, and secured newsprint over the whole counter. Despite our best efforts, we ended up doing this twice!

In the end, our problem was  one of aesthetic. While I loved the copper on its own, I didn't like it against the red sections of cabinet. AND I LOVE RED. I couldn't part with it, so we painted over the copper with hammered silver. Even though its darker than I hoped, there's no way I'll spray again any time soon.

Spray paint  was the only type of paint I found that promised the 'hammered' metal look. For a 60 square foot section I used 4 cans of copper Rustoleum paint (and one face mask) from Home Depot. This was BY FAR a better brand then the second one from Canadian Tire. It didn't cover as much with one can, however it went on more smooth and the trigger was really comfortable. Laugh at that, but this matters after painstakingly spraying 7 coats in 2 hours. The second brand's traditional spray top meant I couldn't use the tip of my finger for a couple days after -- seriously, I couldn't type without grimacing.


Sorry for the bad light. The Rustoleum can on the right was easily worth the extra $3/can.
Over all, I'm happy with how it turned out. Its an affordable way to get a traditional look and, from what we know from living with the original backsplash for a few years, should wear really well.

Overall Costs:

$30- wall paper
$40- copper paint
$27- silver paint
7-     aerosol cans to the eco-station
a few- brain cells
30 min- prep
2 hours duration- spray time

Sunday, March 13, 2011

Seedy Saturday- Perennial Seeds to Try

At the garden house, perennials are the financial equivalent of a kick in the teeth to my budget.  There 's no question that they end up being worth the money- returning year after year. But sometimes I don't have the money.

In the years I've got a strict budget or a large project, I've bought perennials at the end of the season when they're heavily discounted.

I've also grown perennials from seed- which is by far the most affordable option. A seed packet usually costs $2- 4 and there are dozens, if not hundreds of seeds per packet. Not all perennials are easy to grow from seed; Lois Holes' Perennial Favourites book is a great resource and she usually includes whether the plants are easy to grow from seed.  Even when she's advised against it, if its a plant I really want in my yard-- in LARGE QUANTITY- then I've tried growing it from seed just to see. It's really cheap to fail.

Here are some of the perennials I've had luck with:

Jacob's Ladder is a shade loving plant with an upright habit and some capacity to take over. I think the leaves look really unique- set closely together they form the look of a ladder. Their pretty flowers grow in purple bunches early in the summer. I grow this plant in the complete shade in a strip of dirt bordered by our deck and patio. These plants flowered the first season I transplanted them out and have grown taller and more profuse every season since.

Silver Sage is a curious looking plant. It has large blue-grey, furry leaves grown in the form of a rose. Its flowers grow atop a tall, wide stalk. I think its a bit like hens and chicks on steroids -- plus it flowers. I have it in a spot in part-shade and its grown well- though the slugs have really enjoyed the leaves. It grew to full size the second summer I transplanted it out... full size being the size of one of the larger hostas.

Yarrow is a plant I grew up picking in the Rockies. I liked it so much I tried to make my wedding bouquet out of these medicinal flowers (it turned out looking like a giant cauliflower- and so it didn't make the service!) The plants are about 2 to 3 feet tall with dusty green leaves that wave like whispy ferns. Their flowers are tiny daisy- looking things snuggled close together creating a wistful canopy. In the wild I've only seen white however you can buy plants and seeds that are many different colours including pink, orange and yellow. To grow them for their medicinal properties (Salt Spring Seeds reports that yarrow is an "Esteemed cold and fever plant. Soothes and heals external wounds and skin conditions of all kinds. An infusion of the leaves makes a nourishing tea as well as a great hair wash."), grow the white ones.  In my yard, yarrow has been extremely non-fussy, winter hardy and drought tolerant.

This spring I'm looking forward to seeing if my Chinese Rhubarb and Bergamot plants survived. Both transplanted well into the garden last summer... but we'll see if they survived the test of Edmonton's longest winter in my life time.

Thursday, March 10, 2011

Great Resources for your inner Foodie and Urban Farmer

While your best resources for urban farming are local farmers--- who, if you live in Edmonton, can be found tonight at the Alberta Avenue Farmer's Market--- one of the best print resources is Mother Earth News magazine. It's cheap to order (here), and comes compliments of Canada Post directly to your mailbox.

If you're interested in books on Urban Farming, check out Mother Earth News' book store for some great titles. Also exceptional is most of the materials put out by Storey Publishing. Go through their book lists here for great ideas and inspiration.

Also, for all the foodies out there, check out Spezzatino Magazine for some delectable food information and pictures. All subscription proceeds go to supporting the Healthy Food Bank (check out my blog post on squash here).

If you have more suggestions of resources, share them in the comments section below.

Wednesday, March 9, 2011

Kitchen Report #1: Reno Take 2

Following up on my post Doing it Right the First Time, we are nearing the completion of our kitchen project- three years after renos began. Oh the last couple weeks have been painful! Mat asked at one point, "Were we anywhere close to 80% done?"

This is why we don't finish things- the little details are a major pain in the derriere.

Crown moulding, fiddly painting, removing wall sockets, connecting lights. We've procrastinated on this stuff for a reason: its fiddly and doesn't quite have the KAZAM of new cork flooring, efficient shiny appliances, and countertops. In fact, all this work and most of our guests don't seem to notice right away that anything is different.

But the truth is, I notice. One of the finished details I'm most excited about is our cabinets.

Mat built the cabinets around the fridge and stove from scratch and we saved what we could of the original base cabinets on the east wall. While this method we saved money and landfill space, we've had some troubles: a couple of the doors never closed right and the paint chipped after only a year. This stuff bugged us both on a regular basis- and now, after much cursing, it is fixed it!

We kept all the base parts of the original cabinets on the wall to the right. Mat then had the tricky job of making doors for both new and old sets of base cabinets. This was his first time with such a project- pretty handy guy, eh? 

Note the speakers at the ceiling flanking the microwave? They were the first thing on our list of 'additions'. Best call we could have made!

Mat rejigged the cabinet doors so they close perfectly. We also (with the help of my dad) re-painted the cabinets with a low VOC paint.  This time we decided to pre-meditate the chipping and finish it 'antique'. This meant painting the fronts with a coat of bright blue, then two coats of cream, then sanding the 'worn bits'. I then did a coat of 'white wash'. I love the white wash effect- its an easy way to add depth a painted surface and softens the colours.

What do you think- should I add a final layer of wax to buff them a bit?

 To white wash:

1. Mix 8 parts water with 1 part white (or any colour) paint
2. Using a rag and literally wash the surface
3. After a couple minutes of dry time, go over the area again with a clean, dry cloth to smooth out the streaks
4. Repeat if necessary.


The finished look isn't for everyone, but I think it suits our kitchen perfectly.

Sunday, March 6, 2011

Seedy Saturday- 2011 Seed Order

It's done. My seed order is in and in five days I shall be digging about in a bag of dirt and tracking said dirt about the house. The girls will eagerly help fill the seed trays with soil and water. For the next two months, dirt will settle in a fine dust over most of the main floor and the dining room will smell like summer after a hard rain.

There is nothing that gets me through the last couple months of winter better than starting seeds indoors. I love what it affords me: healthy, organic seedlings for a tenth of the price at the greenhouse. I love how it makes me feel a little rebellious, like I've defied the natural order of things. My little tomato seedlings wave like middle fingers at the snow.

This love affair has introduced hundreds- quite literally!- hundreds of seedlings to our home. They fight us for sunlight and expand on all available surface areas. Mat is regularly bewildered by the sheer volume of plants littering our 700 square foot main floor. He sputters, "Where exactly are you going to plant 36 tomato plants?" And, "What the hell is feverfew?"

It's true that I've regularly gotten carried away with the sheer seratonin of it all. But, in deference to my family and part-time job, this year I aim to show restraint. Cutting back is hard, especially in the heat of the moment when ordering "Gogi- the elixir of life" is just a mouse click away.

What do I cut this year? Annual flowers. In the past, many of the annuals I started inside (petunias, snapdragons) have not flowered until well into the summer. With our short growing season and my lack of a greenhouse, having blooms in June is worth my buying annuals from the greenhouse. Since I've had great luck growing sweet peas, nasturtiums and marigolds from seed started outside, I'll do this again (my marigolds seed themselves really successfully. I let them start where they wish then transplant them to other parts of the garden as I need them.).

What else do I cut? Experimental plants. In years past I've grown eggplant (tiny harvest!), sweet peppers (only the hot ones have grown easily for me), corn (two failed years), stevia (shrivelled in the sun) and strawberry spinach (grew well, but took up lots of space). While I may give these crops another go- this year my goal is to fill the freezer and cellar with the basics: carrots, onions, potatoes, peas and tomatoes. These are the crops we love to eat, so these are the crops I will grow in my tiny space.

Did I mention ordering zucchini, cucumber, arugula, beets, basil, parsley, mustard and butternut squash? But at least this year I didn't order feverfew, quinoa, oats and flax.... I promise I'm keeping it simple baby.

Thursday, March 3, 2011

Salad a la Lady Bugs

After the market tonight, we had a treat. Along with the Leduc grown, heritage greens, our bag of salad from Green, Eggs and Ham included TWO lady bugs. In spite of the deep freeze outside, we spent the better part of a half hour tickling creatures that epitomize summer and nature's pest control. 


As far as my mid-winter, summer-like evening snack: exceptional. I saw beet greens, baby swiss chard, sorrel, a little dandelion. I tasted fennel and mustard- nice and spicy. With the greens I added grated carrot, 


hulled hemp seed (for some Omega 3 POP), parmesan cheese and cranberries. Salt, pepper and a drizzle of virgin olive oil was all the dressing this salad needed.  Who'd have thought salad and bugs could make my night?   


For the $6 price tag, I could make about 8 salads this size.  Compared to my usual evening snack of crackers and cheese (or nachos and salsa!), its not much more expensive. Besides, it includes a whole lot less fat, more flavour and is a pleasure to the eye. Thanks, Andreas, for the treat.

See You at the Market?

So we're heading out for elk hamburgers at the Alberta Avenue Farmer's Market (118 Ave and 92 St). See you there? It's open until 8pm tonight... I'll be the one in the pink nipple hat if you want to say "hi" and perhaps warm me up with your garden plans!

Tuesday, March 1, 2011

"Beat it, Winter": But until then there's Snowsuits

Dang it Winter, let go already. Like lint on my pantyhose. Like a leech on the inside of my thigh. Like a cold without echinacea. Like Madi on my neck in a sea of strange men.

What? Are you frightened? Hungry? Bull-headed? Why can you not let go?

You've got some serious self-assessment to do. There are 20 ever lengthening days left until Spring bullies you out of here (You know how you get when the sun comes out. Like my husband when I host book club, just melts away). Is that all this is? Grand standing? I swear, if you get all global warming on me I'm going to pull out my hair dryer and blow what I can of you away.


 - 31 tonight, - 26 tomorrow, - 31 Saturday. Winter, this is seriously unacceptable. It's the beginning of March. Have you never visited Vancouver at this time of year? Dancing about in Cherry blossoms, they are. And then you'd get an early- longer- northern holiday... 

What was that, Winter? Oh... Right. This is your holiday spot?
----

I guess I've chosen this. For all sorts of weird and wonderful reasons, I chose this place. Cold days such as these call for positive thoughts: Like of snow forts. Ice slides. Skating rinks. Hibernating. The euphoric feelings one gets on entering the warm house every single day.

The key to making the best of winter while carting kids around, for me, has been their MEC snowsuits. An uber investment- at $100 a pop- I never worry about the girls being too cold. And they fit so well, they have to do some pretty crazy stuff to end up with snow down their backs. 

To help cover the cost, my girlfriend and I have cooperated. Our kids are in between each other in size so each season we've taken turns buying suits. This year, she bought my oldest daughter's size while her son took on the middle size. Lily remains in an 18 month suit... for the second year in a row.

Soon, I pray really soon, I will retire the suits for another season. But until then, we will bundle and alternately curse then praise Winter.


Maybe I need to just let it go. This- -31- is my reality.